A Step-by-Step Guide to Removing Sand from Clams Before You Cook Them
If you’ve ever ordered a clam dish in a restaurant and found yourself biting down on a grain of sand, you know the feeling—a mix of disappointment and discomfort. The good news is that getting rid of that pesky sand from clams is entirely possible and, in fact, surprisingly easy.
Whether you’re a seasoned chef or a home cook looking to elevate your seafood game, knowing how to clean clams properly is crucial to serving up a perfectly smooth, grit-free dish.
So let’s dive in! Here’s your ultimate step-by-step guide to cleaning clams and getting rid of that sandy surprise before cooking.
Why Does Sand End Up in Clams?
Before we get into the cleaning methods, it’s helpful to understand why clams are gritty in the first place. Clams are filter feeders, meaning they suck in water to gather food. During this process, they often filter out tiny particles like sand. When clams are harvested, the sand stays trapped in their shells or in their bodies, making it essential to cleanse them before you cook.
Not only does the sand create an unpleasant eating experience, but it also adds unnecessary grit to your dish. But don’t worry, with the right technique, you can remove almost all of the sand and enjoy a much cleaner clam dish.
Tools You’ll Need
Before we begin, let’s gather the essentials. Luckily, cleaning clams is a simple task, and you don’t need an elaborate setup.
- Fresh clams: Always buy them live. You’ll know they’re fresh if they’re still alive—if any are open, give them a tap. If they don’t close, discard them.
- Large bowl: You’ll need a vessel large enough to submerge the clams in water.
- Salt: Use non-iodized sea salt for the soaking process. Iodized salt can affect the clams’ taste.
- Water: Fresh, cold water is best for soaking.
- Clean cloth or paper towels: For wiping down the clams after cleaning.
- A brush or sponge: Optional, but can help scrub the shells.
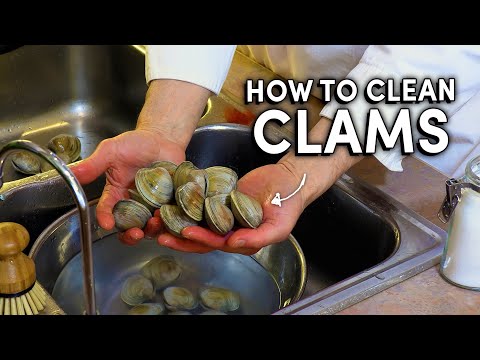
Step 1: Rinse the Clams

The first thing you want to do is give your clams a good rinse under cold water. You don’t need to go overboard here, just a quick scrub to remove any surface dirt or debris from the outside of the shells. Sometimes, clams come with mud or barnacles stuck to the shells, and rinsing them helps get rid of that initial layer of grit.
Tip: Use a soft-bristled brush if you notice any stubborn particles stuck on the shells. A gentle scrubbing motion will do the trick.
Rinsing Checklist:
- Run the clams under cold water.
- Scrub with a brush if necessary.
- Set the clean clams aside in a bowl for the next step.
Step 2: Soak the Clams in Saltwater
Now that your clams are clean on the outside, we’re going to let them do the heavy lifting of sand removal. Clams filter water through their gills, and if you give them the right environment, they’ll naturally expel the sand from inside their shells. This method is often called “purging.”
To do this, fill a large bowl with cold water and add around 1/4 cup of non-iodized sea salt. Make sure the water is salty enough to mimic the conditions of the ocean. It’s crucial because it encourages the clams to open up and filter out sand. Submerge your clams in the saltwater solution and cover the bowl with a clean cloth or lid.
Soaking Tips:
- Soak for at least 20 minutes, but up to an hour if possible.
- Do not use iodized salt, as it can affect the flavor of the clams.
- Stir the clams gently a few times to encourage them to expel sand.
- If you notice the water turning cloudy or dirty, it means the clams are doing their job, and the sand is being expelled.
What Happens During Soaking?
While the clams are soaking, they’ll begin to open and close their shells. This process allows them to filter out sand and grit. If your clams are healthy, they’ll be actively releasing sand during this time.
Can You Soak Clams for Too Long?
Clams are a type of shellfish that can be eaten either cooked or raw. They are a good source of protein, zinc, and vitamin B12. Clams can be soaked in salt water before cooking in order to soften them and remove any sand or grit that may be inside. Soaking clams for too long can make them slimy and cause them to spoil.
Step 3: Scrub and Rinse Again
After soaking, it’s time to give your clams another rinse to make sure you’ve removed as much sand as possible. You’ll likely notice that the water is much cloudier now, which is a good sign—the clams are expelling the grit that was trapped inside.
Use cold water to rinse the clams thoroughly under running water. If needed, scrub the shells again to remove any remaining surface dirt. I usually do a quick visual inspection to make sure they look clean.
Tip: If any of the clams are still open after soaking, give them a tap. If they don’t close, discard them, as they might be dead and unsafe to eat.
Rinsing Checklist:
- Rinse clams under cold running water.
- Scrub them again if necessary to remove any final bits of dirt or sand.
- Discard any clams that are open and unresponsive.
Step 4: Dry the Clams and Get Ready to Cook
Now that you’ve removed the sand and cleaned the clams, it’s time to get them ready for cooking! Lay out the clams on a clean cloth or paper towels and gently pat them dry. This will prepare them for the final step in your recipe, whether you’re steaming, baking, or sautéing them.
Remember that clams are best cooked fresh. If you’re not cooking them right away, you can store them in the fridge in a bowl covered with a damp cloth for up to 24 hours. Never store clams in a sealed plastic bag, as they need to breathe.
Additional Tips for Perfect Clams
Here are a few bonus tips that will help ensure your clam-cooking experience goes off without a hitch:
1. Use a Bowl, Not a Strainer
When soaking your clams, use a large bowl instead of a strainer. A strainer can sometimes allow sand particles to slip through, while a bowl will keep everything contained, making the process cleaner.
2. Don’t Overcrowd the Clams
If you’re cleaning a large batch, avoid overcrowding the clams in the bowl. If the clams can’t move around freely, they won’t be able to filter the sand out as effectively.
3. Clean Your Cooking Equipment
After handling the clams, make sure to clean all your utensils and surfaces thoroughly to avoid any contamination.
4. Check for Grit After Cooking
After cooking, if you’re concerned about any remaining grit, use a spoon to open one clam and check inside. If you see sand, don’t panic—you can rinse them again before serving.
Table: Quick Overview of the Clam Cleaning Process
| Step | Details |
| Rinse the Clams | Scrub and rinse under cold water to remove surface dirt. |
| Soak in Saltwater | Soak in a 1/4 cup of non-iodized sea salt and cold water for 20 minutes to 1 hour. |
| Rinse Again | Rinse thoroughly to remove any sand and grit that the clams have expelled. |
| Dry and Cook | Pat dry and cook immediately or store in the fridge under a damp cloth for up to 24 hours. |
Do Clams From Store Need to Be Cleaned?
Do clams from store need to be cleaned?
The answer to this question is yes, clams from the store do need to be cleaned. It is important to clean clams thoroughly before cooking them, as they can contain grit and sand.
There are a few different ways to clean clams. One way is to place them in a colander and rinse them under cold running water. You can also scrub the clams with a brush to remove any grit or sand.
Another way to clean clams is to soak them in a bowl of cold water with a tablespoon of salt for about an hour. This will help to loosen the grit and sand.
Finally, you can cook the clams before cleaning them. This will help to loosen the grit and sand, and make it easier to remove them.
Cleaning clams is an important step in preparing them for cooking. By following these simple steps, you can ensure that your clams are clean and ready to eat.
Conclusion
And that’s it! Cleaning clams and getting rid of the sand doesn’t have to be a daunting task. With just a little patience and the right method, you can ensure that your clams are sand-free and ready to take center stage in your dish. Whether you’re making a clam chowder, a seafood pasta, or a classic steamed clam dish, a clean, grit-free clam will elevate the meal from good to exceptional.
Remember, the key to a great clam dish isn’t just in the cooking—it’s in the preparation. Take your time, follow these steps, and you’ll be enjoying the freshest, most flavorful clams without a hint of sand. Enjoy!