How Do You Cut and Peel Butternut Squash for Roasting?
Butternut squash is the culinary equivalent of a warm hug on a chilly day. With its rich, nutty flavor and creamy texture, it makes the perfect side dish for fall and winter meals. But, before you can enjoy that roasted goodness, you must peel and cut this dense, oblong vegetable. It’s not a simple task. Fear not, because I’m here to walk you through the process with a few handy tips and tricks.
Choosing the Right Butternut Squash for Roasting
Choosing the right butternut squash is crucial for achieving a perfect roast. When selecting a squash, look for one with a deep, rich color, typically a solid beige or tan. The color indicates ripeness and flavor.
The squash should feel heavy for its size, which suggests that it’s dense and full of moisture, a key factor for roasting. A light squash might be dry and less flavorful. Firmness is another important sign of quality; press gently on the skin, and it should feel hard without any soft spots. These spots could indicate internal decay or overripeness, which could affect the texture and taste.
Choosing a squash with the right color, weight, and firmness is key. It will set the stage for a deliciously roasted dish that brings out the squash’s natural sweetness.
The Right Tools for the Job
Before diving into the world of butternut squash, let’s talk tools. You’ll need:
- Sharp Chef’s Knife: A sturdy knife is crucial. A dull blade will only make the job harder.
- Vegetable Peeler: A good peeler will save you time and frustration.
- Cutting Board: Make sure it’s large enough to give you room to maneuver.
- Spoon: For scooping out the seeds.
I’ve found that a good, heavy-duty peeler works wonders. The sharper, the better—it’ll glide through the squash’s tough skin like a hot knife through butter.
Step 1: Prep Your Squash
Start by washing the butternut squash in cold water. Dirt and grit can hide in those nooks and crannies, and a quick rinse will ensure you don’t end up with any unwanted guests in your dish.
Quick Tip: Dry the squash thoroughly to avoid slipping while you’re cutting.
Step 2: Trim the Ends
Place the squash on your cutting board. Using your chef’s knife, slice off both ends of the squash. This gives you a stable base to work with and makes peeling and cutting butternut squash safer and easier.
Step 3: Peel the Squash
Here’s where the peeler comes into play. Start from the top and work your way down. Peel off the skin in long strips. It’s similar to peeling a potato, but with a bit more muscle. If you encounter tough spots, don’t be afraid to make multiple passes with the peeler.
Pro Tip: If your peeler struggles with the squash, you might need a more aggressive approach. Sometimes, using the knife to slice off the skin can help, especially if your peeler isn’t up to the task.
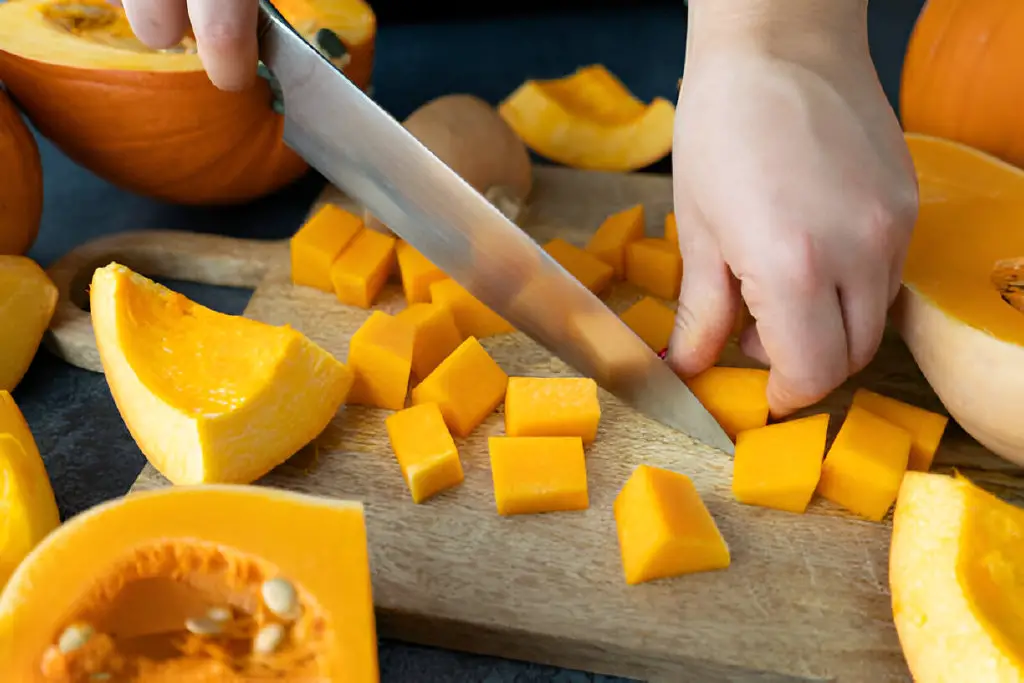
Step 4: Cut the Squash
With the skin removed, it’s time to cut the squash into manageable pieces. Here’s a simple method:
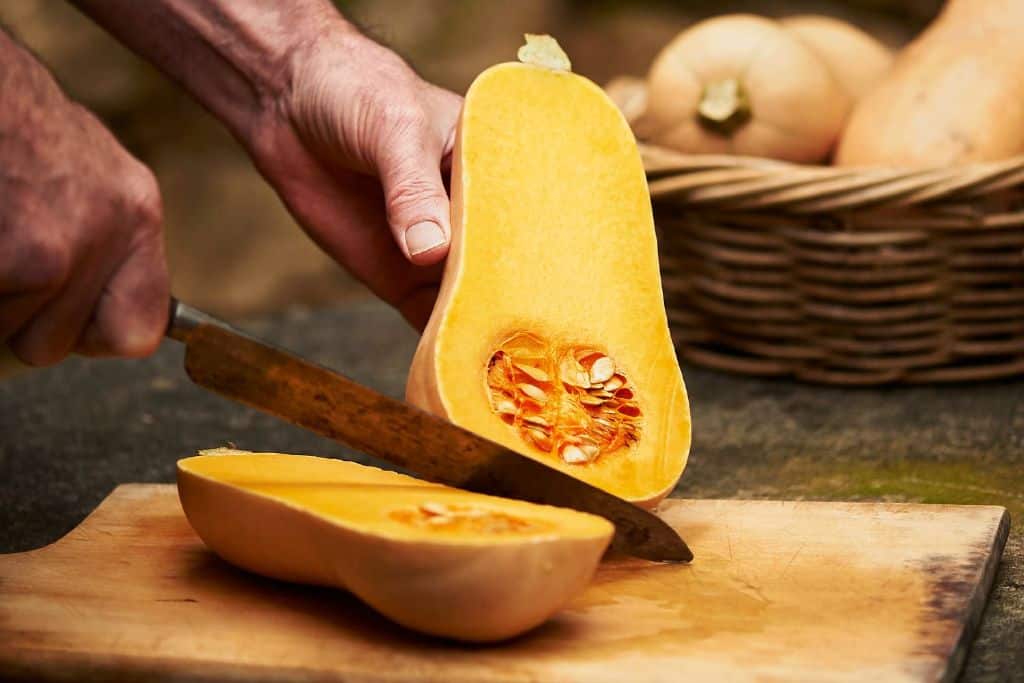
- Halve the Squash: Place the squash on the cutting board and slice it lengthwise. The squash will have two distinct sections: the bulbous bottom and the straighter top. The top section is usually easier to handle, so cut it into rings or cubes, depending on your recipe.
- Scoop Out the Seeds: Use a spoon to scrape out the seeds and stringy bits from the bulbous end. You can save the seeds for roasting later if you like—just give them a good rinse and roast them with a bit of seasoning.
- Cut Into Desired Shapes: Depending on your recipe, cut the squash into cubes or slices. For roasting, I usually go for cubes, as they cook evenly and get that lovely caramelized exterior.
Cutting and Peeling Table
| Step | What You Need | Tips |
| Trim Ends | Chef’s Knife | Provides stability while cutting. |
| Peel Squash | Vegetable Peeler | Make multiple passes if necessary. |
| Halve Squash | Chef’s Knife | Be careful of the tough skin. |
| Scoop Out Seeds | Spoon | Save seeds for roasting if desired. |
| Cut Into Shapes | Chef’s Knife | Choose shape based on recipe needs. |
Step 5: Roast to Perfection
Once your squash is cut into cubes or slices, toss them in a bit of olive oil, salt, and pepper. Spread them out on a baking sheet, making sure they’re not crowded—give each piece some space to roast evenly.
Roast the squash in a preheated oven at 400°F (200°C) for about 25–30 minutes. Toss halfway through for even cooking. When the edges are golden and crispy and the squash is tender, you’re ready to dig in.
| Read: Boosting Squash Flavor: Ingredients and Techniques That Work |
Storing Leftover Butternut Squash
Storing leftover butternut squash properly is key to preserving its freshness and flavor. When you have cut pieces, it’s best to keep them in an airtight container or tightly wrapped in plastic wrap before placing them in the refrigerator.
This method helps to prevent the squash from drying out or absorbing other food odors. If you’re looking to store it for an extended period, freezing is a great option.
Blanch the pieces briefly in boiling water. Then cool them in ice water. Freeze them in a single layer on a baking sheet. Finally, transfer them to a freezer-safe bag.
In terms of how long you can safely store butternut squash, cut pieces will typically last about 4-5 days in the refrigerator. If frozen, they can last up to 10-12 months without losing much of their quality. However, freezing may slightly change the texture. This is especially true if the food wasn’t blanched properly beforehand.
Whether refrigerating or freezing, labeling your containers with the date can help you keep track of freshness. Always check for any signs of spoilage before using stored squash, such as a change in color, texture, or smell. By following these best practices, you can enjoy the rich, nutty flavor of butternut squash long after it’s been cut.

Bonus Tips
- Seasoning: For an extra flavor kick, consider adding spices like cinnamon, nutmeg, or paprika before roasting.
- Storage: If you’re prepping ahead, you can store cut butternut squash in the fridge for up to 4 days or freeze it for longer storage. Just be sure to blanch it before freezing to preserve its texture.
Final Thoughts
Cutting and peeling butternut squash might seem like a bit of a chore, but once you get the hang of it, it’s a breeze. The reward is that delicious, roasted squash that can turn any meal into something special. So, roll up your sleeves, grab your tools, and let’s get cooking. Happy roasting!
If you’ve got any tips or tricks of your own for dealing with butternut squash, I’d love to hear them. Drop a comment or share your favorite recipes—I’m always on the lookout for new ways to enjoy this fantastic veggie.