Quick and Easy: How to Blanch Brussels Sprouts in the Microwave
Are you a fan of Brussels sprouts but find yourself short on time when it comes to preparing them? Look no further! We have a game-changing solution that will make your life in the kitchen so much easier.
Imagine achieving perfectly blanched Brussels sprouts with vibrant color, a crisp texture, and all the nutrients intact, without the hassle of boiling water on the stove. Yes, you heard it right – we’re going to show you how to blanch Brussels sprouts in the microwave!
Blanching Brussels sprouts is a fantastic technique to preserve their natural goodness while enhancing their taste. And with the microwave method we’re about to unveil, it’s never been more convenient. In just a few simple steps, you’ll have tender, delicious Brussels sprouts ready to be enjoyed in your favorite recipes.
Say goodbye to overcooked or undercooked sprouts, and hello to a hassle-free cooking experience. Get ready to take your Brussels sprouts game to the next level as we guide you through this microwave blanching adventure!
Basics of Blanching Vegetables
Blanching vegetables may seem like an extra step in the cooking process, but it’s a technique that shouldn’t be overlooked. This simple yet powerful method involves briefly boiling vegetables and then quickly plunging them into ice water to halt the cooking process.
Why is blanching necessary, you ask? Well, let’s dive into the reasons why you need to blanch vegetables and how it can elevate your culinary endeavors.
One of the primary reasons to blanch vegetables is to preserve their vibrant color. Vegetables contain enzymes that, when exposed to heat, can cause them to lose their natural pigments and turn dull.
Blanching interrupts these enzymatic reactions, maintaining the vegetables’ bright hues and making them visually appealing. Whether you’re preparing a colorful salad or creating a stunning vegetable medley, blanching ensures that your vegetables retain their vibrant colors, creating a feast for both the eyes and the taste buds.
Blanching also plays a vital role in preserving the flavor of vegetables. By quickly immersing them in boiling water, blanching helps lock in their natural flavors and maintain their crispness. It softens the outer layers of the vegetables while keeping their interiors firm, resulting in a perfect balance of textures. Whether you’re blanching broccoli, green beans, or asparagus, this technique enhances the vegetables’ taste, making them more enjoyable to eat.
Texture is another crucial aspect that blanching addresses. Vegetables that are not blanched before cooking can often become overcooked and mushy. Blanching, however, helps to maintain their desirable texture by partially cooking them and preserving their crispness.
The quick immersion in boiling water and subsequent cooling off in an ice bath stop the cooking process, preserving the vegetables’ crunch while ensuring that they are still tender and cooked through.
Why Blanch Brussels Sprouts in the Microwave
Before we dive into the specifics, let’s briefly understand the concept of blanching and its purpose. Blanching is a culinary technique that involves partially cooking vegetables in boiling water and then quickly cooling them in an ice bath. The purpose of blanching Brussels sprouts, or any other vegetable, is threefold:
- Preservation of color: Blanching helps retain the vibrant green color of Brussels sprouts by deactivating enzymes that can cause discoloration.
- Texture preservation: By blanching, you can maintain the crispness and firmness of the sprouts.
- Preparation for further cooking: Blanching also prepares the Brussels sprouts for other cooking methods like roasting, sautéing, or stir-frying.
Additionally, using the microwave for blanching offers several benefits, such as faster cooking times and minimal clean-up. Now that we have an overview of the process, let’s move on to the step-by-step instructions.
Equipment Needed
To blanch Brussels sprouts in the microwave, you will need the following equipment:
- Microwave-safe bowl
- Microwave
- Colander
- Ice water bath (large bowl or basin filled with water and ice cubes)
- Sharp knife
- Cutting board
- Timer or clock
Ensure that your microwave-safe bowl is large enough to hold the Brussels sprouts comfortably without overcrowding. Overcrowding the bowl can result in uneven cooking.
Step-by-Step Instructions
Follow these simple steps to blanch Brussels sprouts in the microwave:
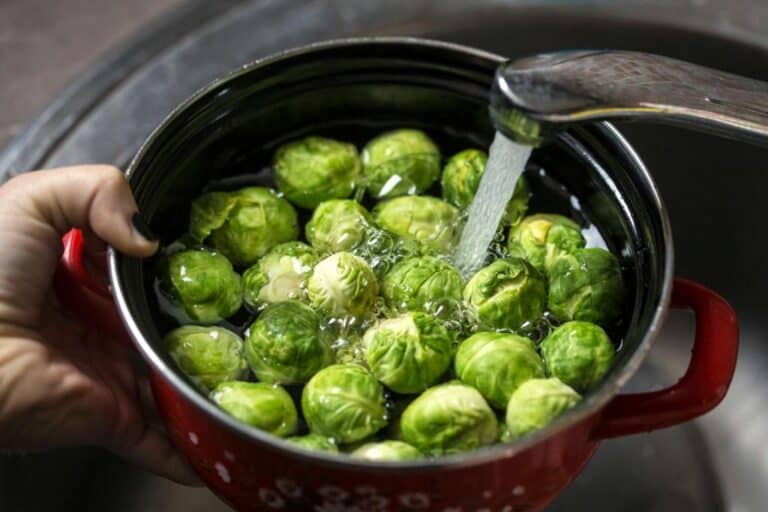
- Prepare Brussels Sprouts: Start by trimming and cutting each Brussels sprout and removing any loose or damaged leaves. Rinse the Brussels sprouts under cold water to remove any dirt or debris. Pat them dry with a clean towel.
- Slice Brussels Sprouts (optional): If desired, you can slice the Brussels sprouts in half to promote even cooking and reduce the blanching time. This step is optional and depends on your preference.
- Place Brussels Sprouts in a Microwave-Safe Bowl: Transfer the Brussels sprouts to a microwave-safe bowl. Make sure to spread them out evenly, allowing room for steam circulation.
- Add Water: Pour a small amount of water into the bowl, enough to cover the bottom but not submerge the Brussels sprouts completely. Around 2-3 tablespoons of water should be sufficient.
- Cover the Bowl: Cover the microwave-safe bowl loosely with a microwave-safe lid or microwave-safe plastic wrap. Leave a small vent to allow steam to escape during the blanching process.
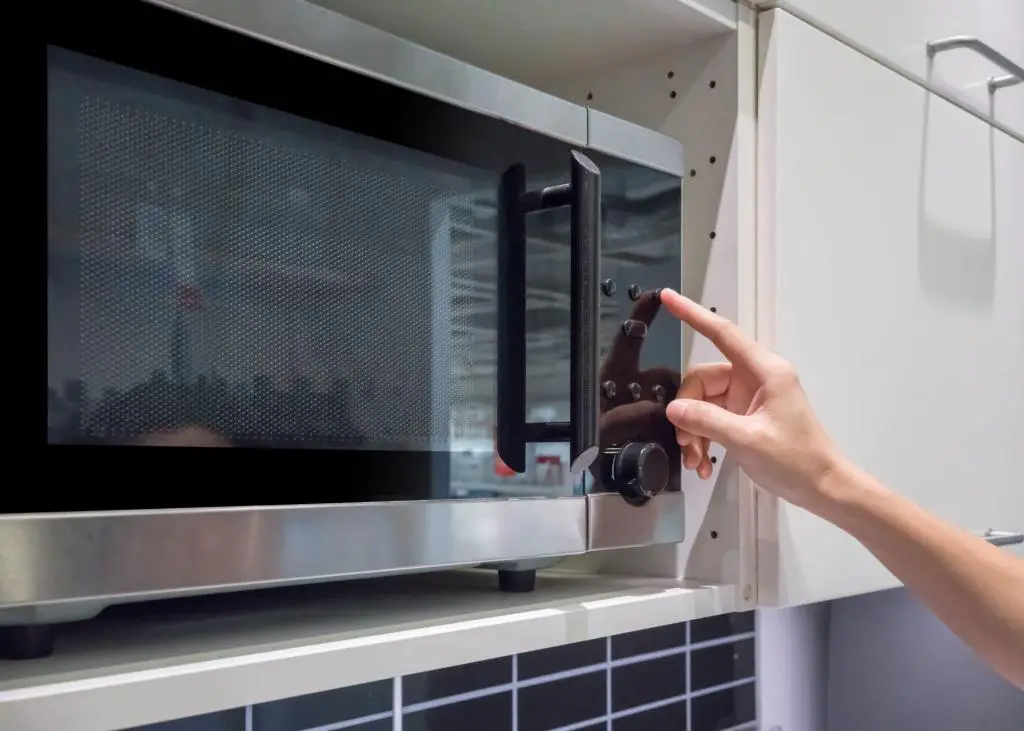
- Microwave on High: Place the bowl in the microwave and cook on high for 2 minutes. Cooking time may vary depending on the wattage of your microwave and the size of the Brussels sprouts. Adjust the time accordingly, aiming for a slightly tender but still crisp texture.
- Check for Doneness: After 2 minutes, carefully remove the bowl from the microwave and uncover it. Use a fork or tongs to check the doneness of the Brussels sprouts. They should be bright green and slightly tender. If they need additional cooking, return the bowl to the microwave in 30-second increments until they reach the desired level of tenderness.
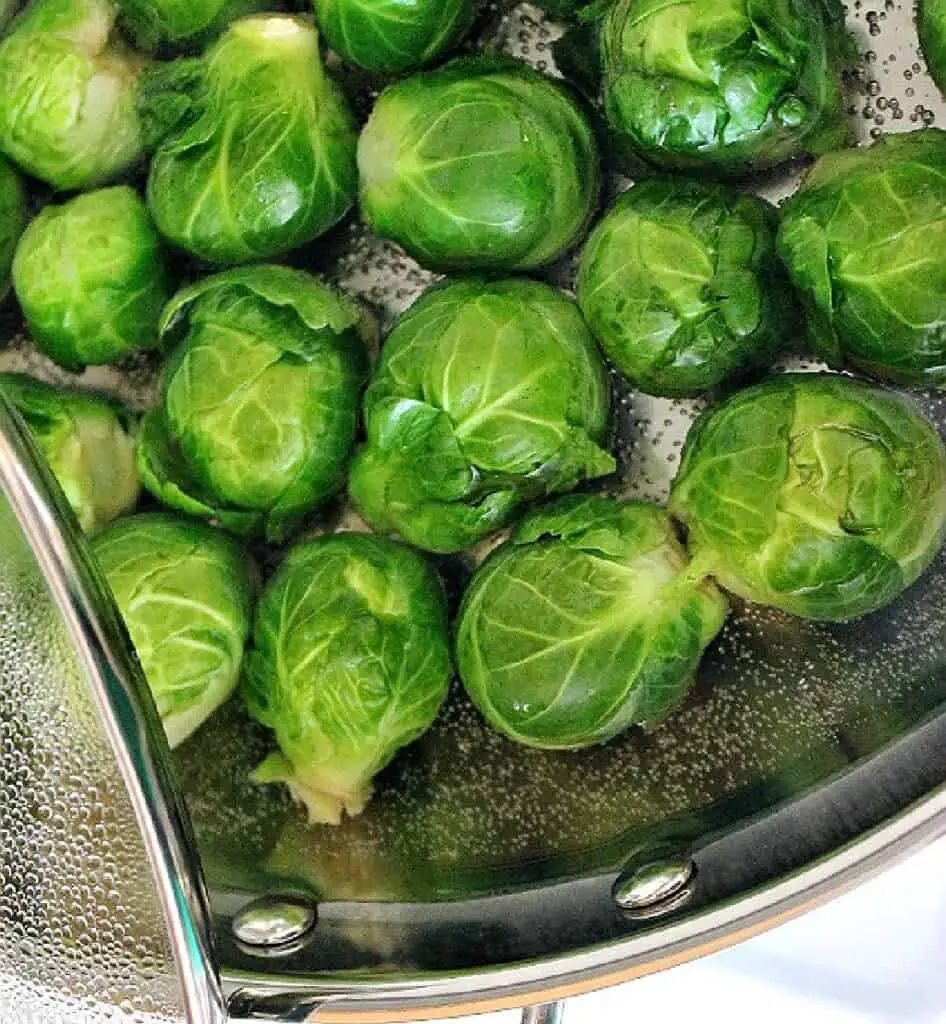
- Transfer to Ice Water Bath: Once the Brussels sprouts are blanched to perfection, immediately transfer them to an ice water bath. The ice water bath will stop the cooking process and help preserve their vibrant color. Let the Brussels sprouts sit in the ice water bath for about 2 minutes.
- Drain and Pat Dry: Drain the Brussels sprouts in a colander, removing any excess water. Gently pat them dry with a clean towel or paper towel before using them in your desired recipe.
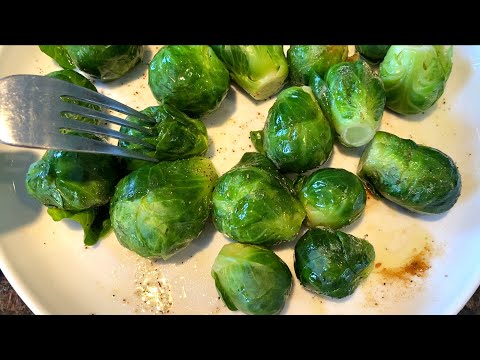
Congratulations! You have successfully blanched Brussels sprouts in the microwave. Now you can use them in salads, stir-fries, roasted dishes, or any recipe that calls for blanched Brussels sprouts.
Tips and Tricks for Successful Microwave Blanching
Here are a few additional tips and tricks to enhance your blanching experience:
- Use fresh Brussels sprouts for the best results. Fresher sprouts will yield a more vibrant color and better flavor.
- If you prefer your Brussels sprouts to be slightly more tender, you can increase the blanching time in the microwave by 30-second increments until they reach your desired texture.
- Remember that different microwaves have varying power levels. Adjust the cooking time accordingly to achieve the best results.
- Be cautious when removing the bowl from the microwave, as it will be hot. Use oven mitts or a towel to protect your hands.
Determining the Blanching Time
To determine the blanching time accurately, consider the following factors:
- Size of the Brussels sprouts: Smaller sprouts will require less blanching time, while larger ones will need a bit longer.
- Personal preference: The blanching time affects the texture of the sprouts. If you prefer a more tender result, you can extend the blanching time by 1-2 minutes.
To test the doneness of the Brussels sprouts, gently pierce a sprout with a fork or the tip of a knife. It should offer slight resistance but not be overly firm. Once you’re satisfied with the texture, it’s time to proceed to the next step.
Cooling and Drying Blanch Brussels Sprouts
After blanching, it’s essential to cool the Brussels sprouts quickly to halt the cooking process and preserve their vibrant color. Follow these steps:
- Transfer the sprouts to an ice bath: Prepare a bowl filled with ice water. Carefully transfer the blanched sprouts from the microwave dish to the ice bath using a slotted spoon or tongs. Let them sit in the ice bath for about 3–4 minutes.
- Drain and pat dry: Remove the Brussels sprouts from the ice bath and drain them thoroughly. Gently pat them dry with a clean kitchen towel or paper towel.
Storing Blanched Brussels Sprouts
If you don’t plan to use the blanched Brussels sprouts immediately, it’s crucial to store them properly to maintain their quality. Here are two storage options:
- Refrigerating blanched Brussels sprouts: Place the dried Brussels sprouts in an airtight container or resealable plastic bag. Store them in the refrigerator for up to 3–4 days.
- Freezing blanched Brussels sprouts: Alternatively, you can freeze the blanched sprouts for longer-term storage. Place them in a freezer-safe bag or container, removing as much air as possible. Label and date the package, and store it in the freezer for up to 10–12 months.
Using Blanched Brussels Sprouts in Recipes
Blanched Brussels sprouts are versatile and can be used in a variety of recipes. Here are a few delicious ways to incorporate them into your meals:
- Salads: Add blanched Brussels sprouts to salads for a refreshing and nutritious crunch.
- Stir-fries: Toss blanched sprouts into stir-fries for a vibrant burst of flavor and texture.
- Pasta dishes: Mix blanched Brussels sprouts with pasta for a hearty and satisfying meal.
- Roasting or sautéing: Take your blanched sprouts to the next level by roasting or sautéing them with herbs, spices, or bacon for added depth of flavor.
Conclusion
Blanching Brussels sprouts in the microwave is a convenient and efficient way to prepare them for various recipes. By following the steps outlined in this article, you can achieve perfectly blanched sprouts with vibrant color and a crisp texture. Experiment with different cooking times and methods to find your preferred level of tenderness. So go ahead, harness the power of your microwave, and enjoy the deliciousness of blanched Brussels sprouts on your next culinary adventure!
FAQs
Can you blanch Brussels sprouts without a microwave?
Yes, you can blanch Brussels sprouts using traditional stovetop or boiling methods.
How long should I blanch Brussels sprouts in the microwave?
The blanching time varies based on the size and personal preference, but generally takes around 3–4 minutes per pound.
Should I cut Brussels sprouts before blanching?
It’s recommended to remove the outer leaves and trim the stems, but it’s not necessary to cut them in half for blanching.
Can I blanch frozen Brussels sprouts in the microwave?
It’s best to thaw frozen Brussels sprouts before blanching them in the microwave for even cooking.
Can I use a microwave-safe plastic container for blanching?
Yes, as long as the container is labeled as microwave-safe, you can use it for blanching Brussels sprouts.
Do I need to add salt when blanching Brussels sprouts in the microwave?
Adding salt to the blanching water enhances the flavor of the sprouts, but it’s optional.
Can I blanch Brussels sprouts without an ice bath?
While an ice bath helps cool the sprouts quickly and preserve their color, you can skip it if necessary. However, the sprouts may lose some vibrancy and texture.