A Guide to Canning Acorn Squash for Long-Term Storage (Preserving Acorn Squash)
When it comes to preserving fresh food, canning is an important skill that lets us enjoy the tastes of our summer gardens well into the winter. There are a lot of fruits and vegetables that can be kept for a long time by canning them. Acorn squash is one that does not get the credit it deserves.
This delightful winter squash variety not only adds a touch of warmth and sweetness to meals, but it also offers a host of nutritional benefits. And luckily for us, we can capture all its goodness by canning it for long-term storage.
You open up a jar of perfectly canned acorn squash from your pantry and are instantly enveloped in its comforting aroma. The rich golden color reminds you of warmer days spent in your garden, tending to these vibrant little gems as they grew on their vine.
As you take each tender bite, you savor the natural sweetness enhanced with just a hint of nuttiness—a true taste sensation that highlights why preserving acorn squash is so worthwhile.
So join us on this journey as we dive into the art (and science) behind preserving acorn squash through canning—your kitchen will become an oasis where summer never truly ends!
Why Do You Need Canning Acorn Squash?
Acorn squash can be stored for several weeks in a cool, dry place. Canning is a method of preserving it for longer periods of time by sealing it in airtight containers.
Canning involves heating the squash and placing it in sterilized jars, typically with a liquid such as water or a light syrup. The heat kills or inactivates microorganisms, enzymes, and other potential spoilage agents, preventing the growth of bacteria, yeasts, and molds. This preservation method allows acorn squash to be stored at room temperature for an extended period without the need for refrigeration.
Canning also helps maintain the nutritional value of the squash for an extended period of time. It’s a popular method for preserving various fruits and vegetables, including squash, to ensure that they remain safe to eat and enjoyable throughout the year, especially during times when fresh produce may not be readily available.
You need to follow proper canning procedures to ensure food safety and to prevent the growth of harmful microorganisms that can lead to spoilage or foodborne illnesses. Make sure to use reliable recipes and guidelines for safe home canning practices.
Equipment Needed for Canning Acorn Squash
To ensure a successful canning process, you will need a few essential pieces of equipment. Here is a list of what you’ll need and their purposes:
1. Pressure Canner: Unlike other vegetables, acorn squash has low acidity levels, which require the use of a pressure canner. This specialized piece of equipment creates the high temperatures necessary to kill harmful bacteria and ensure proper preservation.
2. Jars with Lids and Bands: Choose glass jars specifically designed for home canning. Mason jars are popular choices due to their durability and versatility. The lids have sealing compounds that create an airtight seal when properly processed in the canner.
3. Jar Lifter: This handy tool makes it easy to lift hot jars out of the canner safely without risking burns or accidents.
4. Funnel: A wide-mouth funnel helps transfer the prepared acorn squash into the jars while minimizing spills or messes.
5. Bubble Remover/Measuring Tool: A bubble remover is used to remove air bubbles trapped inside the jar before sealing. It also doubles as a measuring tool to leave sufficient headspace at the top of each jar for expansion during processing.
6. Canning Rack/Trivet: Essential for keeping your jars out of direct contact with the bottom surface of your pressure canner, preventing them from breaking during processing.
7. Towels or Cooling Racks – You will need towels or cooling racks on hand to place hot jars after they’ve been removed from boiling water baths. They are needed in the removal of excess air caps while completed seals form over time.
Having these essential equipment items readily available will make your acorn squash canning experience organized, safe, and successful!
Choosing a Suitable Squash
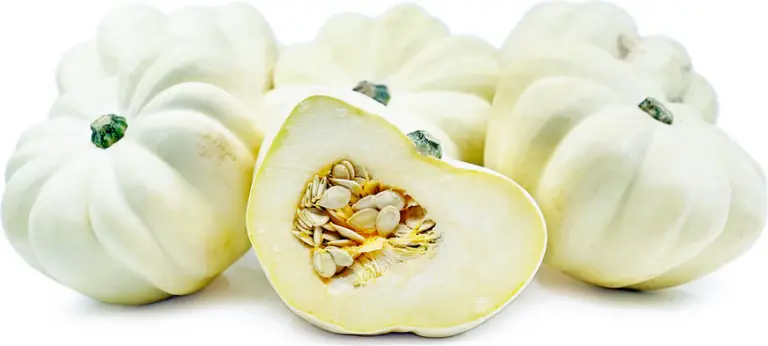
When it comes to canning acorn squash, selecting the right squash is crucial for successful preservation. You want to choose acorn squashes that are ripe but still firm; don’t opt for raw, unripe acorn squash.
Look for squashes that have a deep green color and a hard outer shell. Avoid any squash with soft spots or blemishes, as they may indicate rot or spoilage.
One helpful tip when choosing acorn squashes for canning is to pick smaller-sized ones. Smaller squashes tend to have more consistent flavor and texture, making them ideal for canning purposes. Additionally, smaller squashes are easier to handle and fit better in jars during the canning process.
Another aspect to consider when selecting acorn squash is the thickness of its flesh. The thicker the flesh, the better it will hold up during processing and retain its shape after being canned. By choosing acorn squashes with thick flesh, you ensure that your preserved squash will maintain its desirable texture even after months in storage.
Preparation Steps for Canning Acorn Squash
Step 1. Washing and Peeling
Before you begin the canning process, make sure that your acorn squash is thoroughly cleaned and peeled. Start by washing off any dirt or debris from the outer skin of each squash. Gently scrub them with a vegetable brush under running water to remove any lingering soil.
Once the squashes are clean, it’s time to peel them. Using a sharp knife or vegetable peeler, carefully remove the tough outer skin from each squash. Take care not to cut too deep into the flesh, as this could result in unnecessary waste.
Step 2. Cutting and Deseeding
After peeling all the acorn squashes, it’s time to cut them into manageable pieces for canning purposes. Begin by slicing off both ends of each squash using a sturdy knife. This will create stable foundations for further cutting.
Next, halve each acorn squash lengthwise and scoop out the seeds and stringy pulp using a spoon or an ice cream scooper. Ensure that all seeds are removed, as they can affect the texture and taste of your canned preserves if left behind.
Step 3. Optional Blanching and Cooking
While not essential, many home canners choose to blanch or partially cook their acorn squash before canning to preserve optimal flavor and texture during storage.
Blanching involves briefly submerging vegetables in boiling water, then immediately cooling them in ice water.
To blanch your prepared acorn squash quarters, bring a large pot of water to a rolling boil and carefully lower in batches of squashes using tongs or a slotted spoon. Allow them to simmer for about 2–3 minutes before quickly transferring them into an ice bath.
Blanching acorn squash helps retain color vibrancy while also softening some of the cell structures within the flesh for improved preservation results during canning.
Acorn Squash Canning Procedures

Step 1: Preparing Jars and Lids
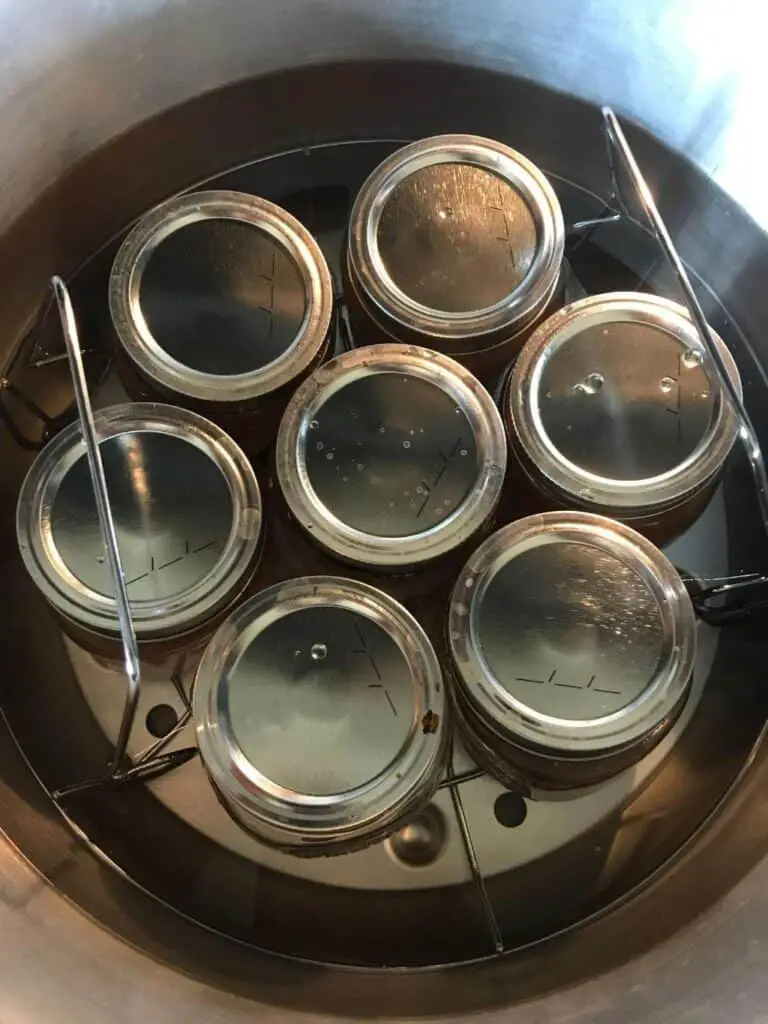
Before you begin canning your acorn squash, make sure that your jars and lids are properly sterilized. Start by washing the jars in hot, soapy water, making sure to inspect them for any cracks or chips.
Then, place the jars on a rack in a large pot filled with water and bring it to a boil. Let the jars simmer for about 10 minutes, ensuring that they are fully submerged.
While the jars are boiling, prepare your lids by placing them in a separate pot of simmering water for around 5 minutes. This softens the rubber seal and helps achieve an effective seal once the lids are placed on top of the filled jars.
Remember to handle both the sterilized jars and lids with clean hands or sterilized utensils to prevent contamination.
Step 2. Filling the Jars
Once your acorn squash is peeled, seeded, and cut into small chunks or slices, fill each jar with carefully packed pieces of squash. According to reputable canning resources, leave a sufficient amount of headspace (typically 1 inch). Do not overfill or underfill the jars, as this affects proper sealing during processing.
Use a blunt knife or spatula to gently remove air bubbles trapped within the jar before wiping off any food residue from its rims using a clean towel dipped in vinegar or lemon juice solution—this ensures better adherence between lid and rim during sealing.
Pro tip: For added flavor enhancement, before filling up those empty spaces within each jar, try experimenting with spices like cinnamon sticks, whole cloves, nutmeg powder, or even brown sugar!
Step 3. Sealing and Processing
To achieve safe, long-term storage for your canned acorn squash, it’s key to transitioning through this final step correctly! Once all of your filled jars have been thoroughly cleaned using natural preservatives (boiling vinegar or lemon juice solution) on their rims, carefully position a hot and sterilized lid over each jar’s rim.
Next, screw on the jar bands or rings firmly but not excessively tight. These are essential for keeping lids in place during processing while allowing air to escape throughout the process!
Processing times can vary based on your elevation level and whether you’re using a water bath or pressure canner. Ensure you have reliable resources available (USDA guidelines or published books) specifically addressing processing times for acorn squash as part of food safety measures related to home canning!
Lastly, place your filled and sealed jars into the water bath or pressure canner according to recommended procedures, processing them for specific durations at precise temperatures necessary for killing potential bacteria spores.
Safety Precautions
Safety should always come first, whether you are canning acorn squash or any other food. Following proper safety precautions is crucial to preventing contamination and ensuring the longevity of your preserved produce.
First, start with clean and sterilized jars. Wash them thoroughly in hot, soapy water and rinse well before placing them in boiling water for at least 10 minutes. You should also sanitize all utensils, such as ladles, tongs, and funnels, that will come into contact with the acorn squash during the canning process.
Another key point to remember is to handle hot materials carefully. When removing jars from boiling water or when filling them with cooked acorn squash, use heat-resistant gloves or jar lifters to avoid burns. The high temperature of both the jars and contents can cause severe injuries if not handled properly.
Additionally, pay close attention to the processing times and temperatures specified in tested recipes for canning acorn squash. Improperly processed foods may lead to spoilage due to bacterial growth or inadequate preservation. Always refer to trusted sources, such as USDA guidelines or reputable canning books, for accurate information on processing times based on altitude.
Storage Tips for Acorn Squash
After you’ve successfully canned your acorn squash, store the jars properly to ensure their long-term preservation. The first step is to choose a suitable storage location that meets certain conditions. Ideally, the storage area should be cool and dark, as exposure to heat and light can degrade the quality of the canned squash over time. A pantry or cellar where temperatures remain between 50 and 70°F (10 and 21°C) is perfect for storing canned goods.
Humidity also plays a role in maintaining the freshness of your preserved acorn squash. Keep the storage area dry, as excessive moisture can lead to mold growth and spoilage. Additionally, make sure that the storage space is well-ventilated to prevent any buildup of condensation.
When it comes to shelf life expectations, properly sealed jars of acorn squash can last for up to one year when stored under optimal conditions. However, it’s always recommended to consume home-canned items within six months for the best quality and flavor.
To maximize efficiency in using your precious stash of canned acorn squash, consider using a first-in-first-out system by placing newly canned batches at the back while bringing older ones towards the front for easy access.
Inspiring Recipe Ideas with Canned Acorn Squash
Once you’ve successfully canned your acorn squash and stored it for long-term use, the next step is to explore the various mouth-watering recipe possibilities that these preserved gems offer. Here are a few ideas to ignite your culinary creativity and make the most of your canned acorn squash.
1. Spiced Acorn Squash Soup
Combine your canned acorn squash with flavorful spices like cinnamon, nutmeg, and ginger for a warm and comforting soup. Add some vegetable broth, onions, garlic, and a splash of cream for richness. Blend it all together until smooth, and garnish with chopped fresh herbs or toasted pumpkin seeds.
2. Acorn Squash Puree
Use your preserved acorn squash as a base for a velvety puree that can be enjoyed on its own or used in other recipes. Simply heat the canned squash on low heat while adding butter or olive oil for richness. Gradually whisk in some milk or cream until you achieve the desired consistency. Season it with salt, pepper, and any other herbs or spices you prefer to enhance the acorn squash flavor profile.
3. Acorn Squash Casserole
Transform your canned acorn squash into an impressive casserole dish by mixing it with sautéed onions, garlic, cooked rice or quinoa, cheese (optional), eggs (to bind everything together), breadcrumbs (for texture), and seasonings of your choice, such as thyme or sage leaves.
Once thoroughly combined, transfer to a baking dish, then add more shredded cheese over top before baking at 350°F until golden brown—around 30 minutes should do!
Preserving Acorn Squash: Conclusion
Canning acorn squash is a wonderful way to preserve its delicious flavors and nutritional benefits throughout the year. We have explored the step-by-step process of canning acorn squash, from preparation to sealing the jars, ensuring that you have all the necessary information to successfully store this winter favorite.
By canning your own acorn squash, you not only guarantee a supply of this versatile vegetable in your pantry but also gain control over the ingredients used in the preservation process. You can adjust seasonings and spices according to your taste preferences or dietary needs.
Remember, safety is paramount when it comes to home food preservation. Always follow reputable canning recipes and adhere strictly to recommended processing times and techniques. With each jar of canned acorn squash lining your shelves, you’ll be able to appreciate homemade goodness while reducing food waste.
So why not give canning acorn squash a try? It’s an empowering skill that allows you to enjoy this seasonal delight long after it disappears from farmers’ markets and grocery stores. Embrace the joy of preserving nature’s bounty with every jar opened, bringing warmth and comfort to even the coldest months of the year. Happy canning!