How To Store Fresh Picked Green Beans From the Garden? (Storage Guide)
Gardening season is here, and for many, that means plenty of fresh green beans! Green beans, also called string beans or snap beans, are a versatile veggie that can be enjoyed raw or cooked, so it’s important to store them properly so they stay fresh.
As a gardener, you need to know how to store freshly picked green beans from the garden properly for long-term preservation.
This article will teach you how to properly store fresh-picked green beans from the garden so that you can enjoy them for weeks or months after harvesting.
We will look at the best ways to store green beans from the garden in order to keep them tasting as fresh as possible. We’ll look at short-term storage options as well as long-term preservation methods.
If you store green beans correctly, you can keep their flavor and quality while also having access to nutrient-rich food all year.
The Importance of Storing Fresh Green Beans Properly
Proper storage is key to ensuring that your fresh green beans stay fresh and flavorful for as long as possible. By storing green beans properly, you can extend their shelf life and enjoy them for days or even weeks after picking.
This is especially important if you have a garden and are looking to maximize the use of your fresh produce.
One of the best things about storing green beans the right way is that it keeps their flavor and texture. Fresh green beans are crisp and tender, with a delicate, slightly sweet flavor.
However, if they are not stored properly, they can become mushy, wilted, and less flavorful. By storing green beans properly, you can maintain their freshness and enjoy them at their best.
Proper storage also prevents spoilage and food waste. Green beans are highly perishable and can spoil quickly if not stored properly. This is especially important if you have a large garden and are looking to preserve as much of your harvest as possible.
The Benefits of Having a Green Beans Garden
Having a green bean garden has many benefits, both for the gardener and for the environment. Green beans are easy to grow and can provide a bountiful harvest of fresh, tasty vegetables.
Here are some of the top benefits of having a green bean garden.
- One of the biggest benefits of having a green bean garden is the freshness and flavor of the beans. Homegrown green beans are much fresher and tastier than store-bought ones, and they can be picked raw green beans at the peak of ripeness.
- This means that they are more nutritious and flavorful, and are a great addition to any meal.
- Another benefit of having a green bean garden is the sense of satisfaction and accomplishment that comes from growing your own food. Gardening can be a relaxing and enjoyable hobby, and the pride that comes from harvesting your own vegetables is unmatched.
- Gardening can provide a sense of connection to the earth and the natural world.
- From a financial perspective, having a green bean garden is a cost savings. Growing your own green beans can save you money on groceries, as you can avoid buying expensive, pre-packaged vegetables from the store. Plus, once you have established your garden, the ongoing costs are minimal, making it a budget-friendly option.
Selecting and Preparing the Green Beans for Storage
To store freshly picked green beans successfully, you need to know how to choose and prepare the beans. When picking green beans from a garden, a store, or a farmer’s market, it’s best to choose ones that were just picked because they have the most nutrients and taste.
How to Properly Pick Green Beans for Storage
The right way to pick green beans for storage is important if you want them to stay fresh and tasty. Green beans are at their peak of ripeness and flavor when they are young and tender, so it is important to pick them at the right time.
To properly pick green beans, start by examining the plants to determine which ones are ready to be picked. Green beans are ready to be picked when they are about four to six inches long and are firm and plump. Avoid picking beans that are too small or too large, as they may not be as flavorful or tender.
The right way to pick green beans for storage is important if you want them to stay fresh and tasty, as those won’t store well. It is also important to inspect the pods for any signs of damage or infestation by pests.
Next, use your fingers or a pair of scissors to gently snap or cut the beans from the plant. Be careful not to damage the plant or pull it up by the roots, as this can harm the plant and affect its future growth.
It is also important to only pick the beans that you plan to use immediately, as overpicking can reduce the plant’s ability to produce more beans in the future.
Cleaning and Prepping Green Beans for Storage
It’s important to clean and prepare green beans for storage if you want them to stay fresh and tasty. Cleaning and cooking green beans the right way can help get rid of any dirt or debris and stop the spread of bacteria or other germs.
- To clean and prep green beans for storage, start by rinsing them under cool water to remove any dirt or debris. Make sure to rinse the beans well, because any dirt or debris left on them can change their taste and texture.
- After rinsing the beans, pat them dry with a paper towel to remove any excess moisture.
- Next, examine the beans carefully and remove any that are damaged or bruised. Damaged or bruised beans can spoil more quickly than healthy ones, so it is important to remove them before storing the beans.
- After taking out any broken beans, trim the ends of the beans that are still good to get rid of any extra stem or leaf material.
- Once the green beans have been cleaned and prepped, they can be stored in a variety of ways.
Overall, cleaning and preparing green beans for storage is an important step to make sure they stay fresh and tasty. By following these simple tips, you can enjoy delicious green beans year-round.
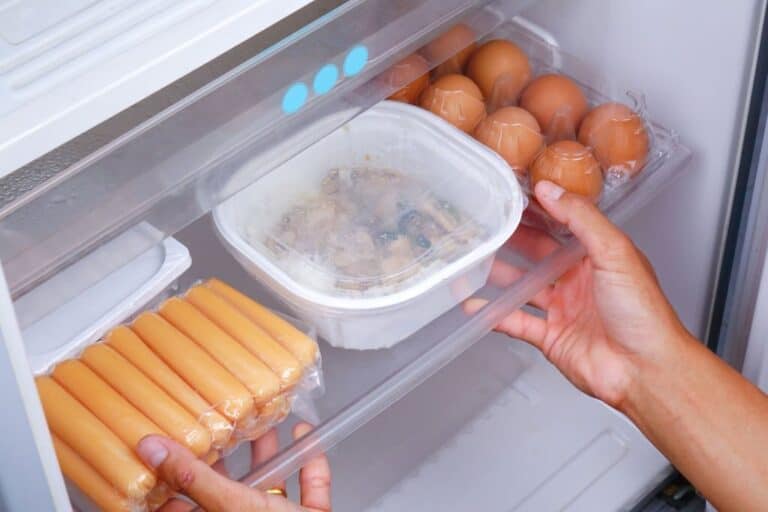
Storing Green Beans in the Refrigerator
How to Properly Package Green Beans for the Refrigerator
Putting green beans in the fridge the right way is important if you want them to stay fresh and tasty. Green beans are a delicate vegetable that can easily wilt or go bad if they are not stored properly.
By following a few easy steps, you can put green beans in the fridge in a way that helps keep them fresh and full of flavor.
- To properly package green beans for the refrigerator, start by rinsing the beans under cool running water to remove any dirt or debris.
- After rinsing the beans, pat them dry with a paper towel to remove any excess moisture. Next, trim the ends of the beans to remove any excess stem or leaf material.
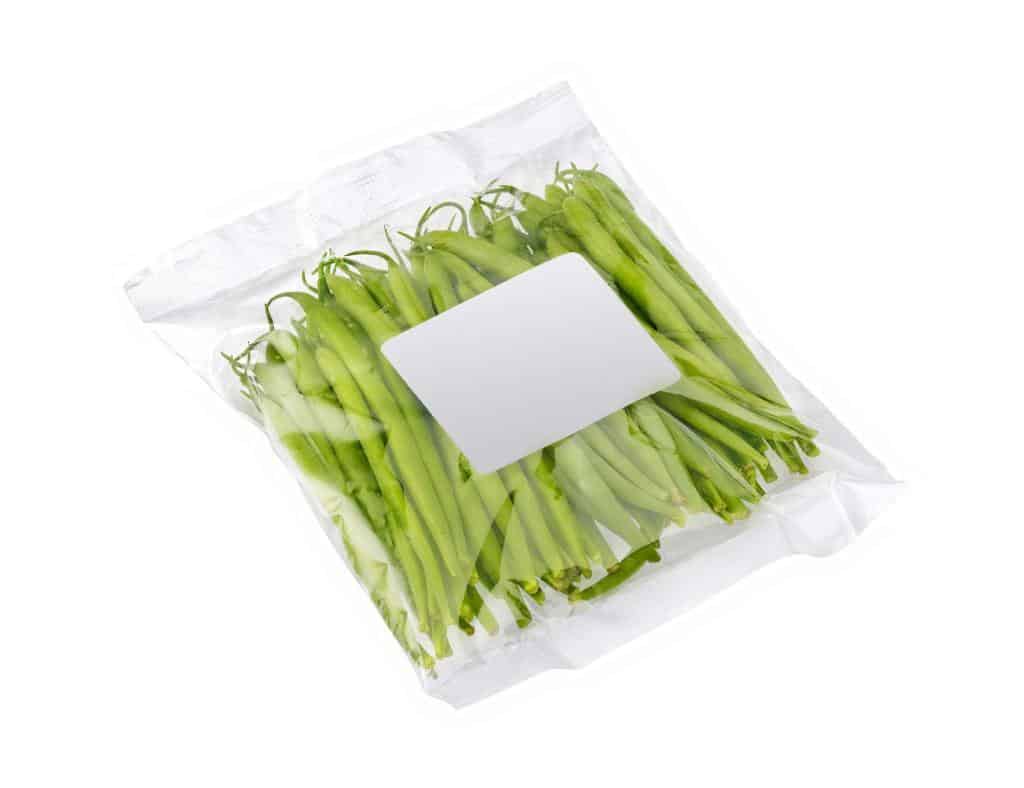
- Once the green beans have been cleaned and prepped, it is time to package them for the refrigerator. The best way to package green beans for the refrigerator is to place them in a plastic storage bag or container.
- Be sure to remove as much air as possible from the bag or container before sealing it, as air can cause the beans to spoil more quickly.
- After the green beans have been properly packaged, they can be placed in the refrigerator.
- Make sure to store the beans in the crisper drawer of the refrigerator, as this is the coldest and most humid part of the appliance.
- Avoid storing the beans near fruits or vegetables that produce ethylene gas, as this can cause the beans to spoil more quickly.
Tips for Maximizing the Shelf Life of Green Beans in the Fridge
One of the best ways to store fresh green beans is in the refrigerator. This method keeps the beans fresh and crisp and allows you to enjoy them for several days after picking.
However, proper storage is key to maximizing the shelf life of green beans in the fridge. Here are some tips for ensuring that your green beans stay fresh and delicious.
- First, select the freshest and most tender green beans possible. This will ensure that they retain their crispness and flavor in the fridge.
- Next, wash the beans thoroughly to remove any dirt or debris.
- Trim off the ends and cut the beans into the desired length, typically around two inches.
- To store green beans in the refrigerator, place them in a freezer bag or container with a tight-fitting lid.
- Squeeze out as much air as possible from the bag or container, as air can cause the beans to spoil more quickly.
- Place the bag or container in the crisper drawer of your fridge, which is typically the coolest and most humid part of the fridge.
- To maximize the shelf life of green beans in the fridge, use them as soon as possible after picking.
Green beans will typically stay fresh for up to a week in the fridge, but they will start to lose their crispness and flavor after a few days. If you don’t think you’ll be able to use the green beans within a week, consider freezing them or drying them for longer-term storage.
Storing Green Beans in the Freezer
The Pros and Cons of Freezing Green Beans
Freezing green beans is a popular method of preserving their freshness and flavor. In this method, the beans’ temperature is lowered below freezing. This stops bacteria and other microorganisms that can cause beans to go bad from growing.
Frozen green beans can be stored for several months, making them a convenient option for meals and snacks. One of the best things about freezing green beans is that their taste and texture stay the same.
Frozen green beans can be thawed in a freezer bag and used in a variety of dishes, such as soups, stews, and casseroles. They can also be added directly to cooked-from-frozen dishes like stir-fries and curries.
However, there are also some disadvantages to freezing green beans. One of the biggest drawbacks is that freezing can cause the beans to lose some of their crispness.
INFO
When thawed, frozen green beans may be slightly less crisp and tender than fresh green beans. Also, in order to freeze green beans, you need a freezer, which some people may not have or be able to use.
How to Properly Package Green Beans for the Freezer
Putting green beans in the freezer the right way is important if you want them to stay fresh and tasty. Green beans are a delicate vegetable that can easily wilt or go bad if they are not stored properly.
By following a few easy steps, you can freeze fresh green beans in a way that helps keep them fresh and full of flavor.
- To properly package green beans for the freezer, start by rinsing the beans under cool running water to remove any dirt or debris.
- After rinsing the beans, pat them dry with a paper towel to remove any excess moisture.
- Next, trim the ends of the beans to remove any excess stem or leaf material.
- Once the green beans have been cleaned and prepped, it is time to package them for the freezer. The best way to package green beans for the freezer is to place them in a plastic storage bag or container. Be sure to remove as much air as possible from the bag or container before sealing it, as air can cause the beans to spoil more quickly.
- After the green beans have been properly packaged, they can be placed in the freezer. Be sure to store the beans in a flat, airtight container in the freezer to help preserve their flavor and texture.
- Avoid storing the beans near other strong-smelling foods, as they can absorb the odors and affect their flavor.
As you can see, properly packaging green beans for the freezer is an important step on how to store fresh green beans.
Tips for Thawing and Using Frozen Green Beans
If you have frozen green beans, there are a few key tips to keep in mind when it comes to thawing and using them.
These tips will help to ensure that your green beans retain their flavor and texture, and are as delicious as possible when you use them in your cooking.
- The first tip is to thaw the green beans slowly and gradually. This will help to prevent the beans from becoming mushy or waterlogged.
- To thaw frozen green beans, place them in the refrigerator overnight or for several hours before you plan to use them.
- Alternatively, you can place the frozen green beans in a bowl of cold water and let them thaw for about 30 minutes.
- Another important tip is to use the green beans as soon as possible after thawing.
- Frozen green beans will retain their flavor and texture best if they are used within a day or two of thawing. If you can’t use the green beans right away, you can refreeze them, but be aware that they may not be as fresh and flavorful as they were before freezing.
TIPS 
When using frozen green beans in your cooking, there are a few key things to keep in mind. First, don’t thaw the green beans before cooking them. Instead, add them to the dish while they are still frozen. This will help to preserve their texture and flavor. Second, use low heat when cooking frozen green beans. This will help to prevent them from becoming mushy or overcooked green beans.
With these tips, you can enjoy delicious frozen green beans in a variety of dishes
Other Methods for Storing Green Beans
1. Canning Green Beans To Keep Them Fresh
Putting green beans in jars or cans is a great way to keep them fresh and full of flavor for a long time. This method of storage allows you to keep green beans on your pantry shelf for several months, making them a convenient option for meals and snacks.
- The first step in canning green beans is to choose the freshest and most tender beans possible. This will ensure that they retain their crispness and flavor after being canned.
- Next, wash the beans thoroughly to remove any dirt or debris.
- Trim off the ends and cut the beans into the desired length, typically around two inches.
- To begin the canning process, fill a large pot with water and bring it to a boil. Once boiling, carefully add the green beans to the pot and blanch them for three to four minutes. This will help to preserve their color and flavor.
- After blanching, remove the beans from the pot and transfer them to a bowl of ice water to stop the cooking process.
- Next, sterilize your canning jars and lids by boiling them for at least ten minutes. Once sterilized, carefully pack the green beans into the jars, leaving about half an inch of headspace at the top.
- Add a teaspoon of salt to each jar, if desired, and then pour boiling water over the beans, again leaving about half an inch of headspace.
- Finally, remove any air bubbles from the jar and wipe the rim clean before placing the lid on top.
- Process the jars in a boiling water bath for at least ten minutes to ensure that they are properly sealed.
- Once cooled, store the jars in a cool, dark place for up to a year. Canning green beans is a great way to enjoy this delicious and nutritious vegetable all year round.
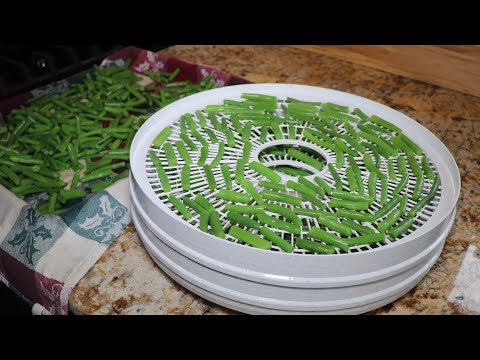
2. Drying Green Beans: An Alternative To Freezing
Drying green beans is another popular method of preserving their freshness and flavor. This method involves removing moisture from the beans, which inhibits the growth of bacteria and other microorganisms that can cause spoilage.
Dried green beans can be stored for an extended period of time, making them a convenient option for meals and snacks.
- To begin drying green beans, choose the freshest and most tender beans possible. This will ensure that they retain their flavor and texture after being dried.
- Next, wash the beans thoroughly to remove any dirt or debris.
- Trim off the ends and cut the beans into the desired length, typically around two inches.
- To remove moisture from the green beans, you can use a food dehydrator or the oven. If using a food dehydrator, follow the manufacturer’s instructions for drying green beans. If using the oven, set it to the lowest temperature possible, typically around 150 to 200 degrees Fahrenheit.
- Place the green beans on a baking sheet and place them in the oven. Leave the oven door slightly ajar to allow moisture to escape.
- Dry the green beans until they are brittle and snap easily when bent in half. This can take several hours, depending on the temperature and humidity of your oven.
- Once dried, store the green beans in an airtight container in a cool, dark place for up to six months.
Dried green beans can be rehydrated and used in a variety of dishes, such as soups, stews, and casseroles.
3. Storing Green Beans in a Root Cellar or Basement
Storing green beans in a root cellar or basement is an easy and effective way to keep the beans’ freshness and flavor.
This method has a lot of advantages over other ways to store food, such as not needing any expensive equipment or ingredients.
To store green beans in a root cellar or basement, simply rinse and pat them dry with a paper towel. Next, place the beans in a clean, airtight container, such as a glass jar or plastic storage bag. The container should be placed in a cool, dark, and well-ventilated area, such as a root cellar or basement.
One of the biggest advantages of storing green beans in a root cellar or basement is that they can be kept for long periods of time without losing their flavor or texture.
Unlike freezing, which can make vegetables lose some of their health benefits, storing green beans in a root cellar or basement keeps most of the vitamins, minerals, and other good things that are in them. This makes them a healthy and tasty option for people looking to add more vegetables to their diet.
Another advantage of storing green beans in a root cellar or basement is that they take up less space than frozen ones. This makes it easier to store large quantities of beans and also allows you to take them with you on camping trips or other outdoor excursions. Green beans stored in a root cellar or basement are also lightweight and easy to transport, making them a convenient option for people on the go.
Overall, storing green beans in a root cellar or basement is a simple and effective way to keep the beans’ freshness and flavor.